linux-commands
command:zip/unzip
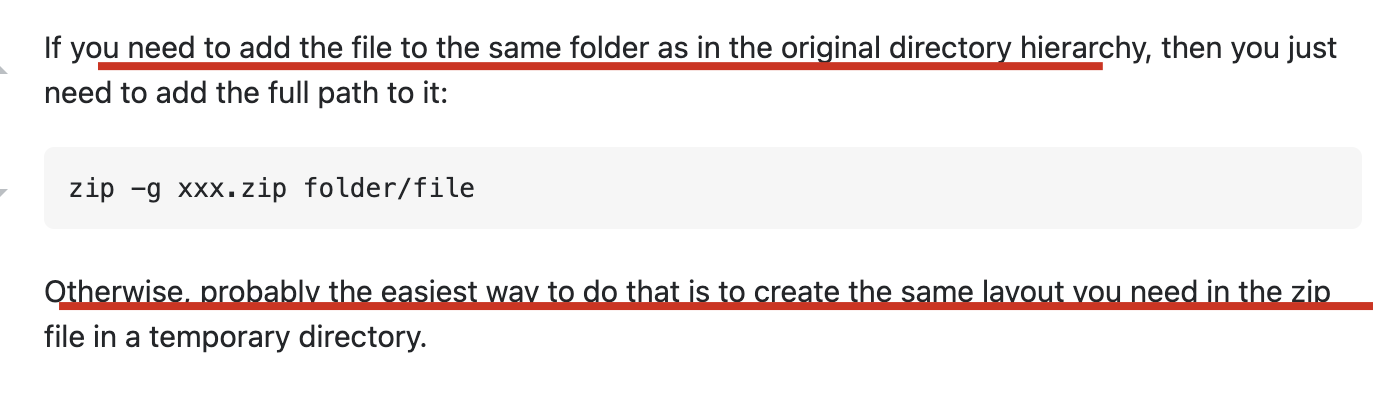
add file into zipped file
zip -g FILE_FROM ZIPPED_FILE_TO
ref
list structure of zipped file
unzip -l ZIPPED_FILE
ref
TODO:list structure of zipped file with limited level
command:tar
# x: extract, f: file
tar -xf FILE

# v: verbose, logging output, careful when extracting big files, e.g. AOSP
tar -vxf FILE
ref:
command:find
find and show file size
| command | sorted | has size | size is human readable | |||
|---|---|---|---|---|---|---|
find . -exec ls -lh {} \; | N | Y | Y | |||
| `find . -type f -exec ls -al {} \; | sort -k 5 -n | sed 's/ +/\t/g' | cut -f 9` | Y | Y | N |
| `find -type f -exec du -sm {} \; | sort -nk1` | Y | N | Y | ||
| TODO: ??? | Y | Y | Y |
sample

ref
unix - How do I get the find command to print out the file size with the file name? - Stack Overflow
how to ignore case in find
find -iname
ref:
how to specify search type
Use -type to specify the search type (default is c for file), here I used d for directory, ref: find type
And then, when I search directory, it would search all the sub-folders with '/' concatenated, so I need to specify -d 1 in order to only search the top current directory.
➜  Application Support find . -name '*electron*' -type d -d 1
./electron-react-boilerplate
./electron-react-typescript
➜  Application Support rm -rf electron-react-boilerplate
➜  Application Support rm -rf electron-react-typescript
how to exclude dir
TODO: in fact, I really can't catch why -prune is combined with -o (or)
# 1. use `-not -path`
find -name "*.js" -not -path "./directory/*"

# 2. use `-path xx -prune`
find . -path ./misc -prune -o -name '*.txt' -print

# 3. use multiple prune (need to add escaped bracket)
find . -type d \( -path ./dir1 -o -path ./dir2 -o -path ./dir3 \) -prune -o -name '*.txt' -print

# 4. use regex prune (-name)
find . -type d -name node_modules -prune -o -name '*.json' -print
ref:
TODO: how to find file with time used
tip: find efficiency comparison
Use a specified directory is the best and fastest;
If not, limit the maxdepth to a number small enough is also ok;
And then consider the directory prune.
Finally bared run is the worst.
➜  hjxh_express_match git:(main) time find .imgs  -name readme-1641287704584-613d44afa250b17be45e5b366487d1dbd42939da44543700b5e7fbd7f6a8ca9e.png
.imgs/readme-1641287704584-613d44afa250b17be45e5b366487d1dbd42939da44543700b5e7fbd7f6a8ca9e.png
find .imgs -name   0.00s user 0.00s system 52% cpu 0.005 total

➜  hjxh_express_match git:(main) time find . -maxdepth 3  -name readme-1641287704584-613d44afa250b17be45e5b366487d1dbd42939da44543700b5e7fbd7f6a8ca9e.png
./.imgs/readme-1641287704584-613d44afa250b17be45e5b366487d1dbd42939da44543700b5e7fbd7f6a8ca9e.png
find . -maxdepth 3 -name   0.01s user 0.05s system 70% cpu 0.079 total

---

➜  hjxh_express_match git:(main) time find . -maxdepth 4  -name readme-1641287704584-613d44afa250b17be45e5b366487d1dbd42939da44543700b5e7fbd7f6a8ca9e.png
./.imgs/readme-1641287704584-613d44afa250b17be45e5b366487d1dbd42939da44543700b5e7fbd7f6a8ca9e.png
find . -maxdepth 4 -name   0.06s user 0.69s system 87% cpu 0.854 total

➜  hjxh_express_match git:(main) time find . -maxdepth 5  -name readme-1641287704584-613d44afa250b17be45e5b366487d1dbd42939da44543700b5e7fbd7f6a8ca9e.png
./.imgs/readme-1641287704584-613d44afa250b17be45e5b366487d1dbd42939da44543700b5e7fbd7f6a8ca9e.png
find . -maxdepth 5 -name   0.14s user 1.86s system 93% cpu 2.137 total

➜  hjxh_express_match git:(main) time find . -maxdepth 6  -name readme-1641287704584-613d44afa250b17be45e5b366487d1dbd42939da44543700b5e7fbd7f6a8ca9e.png
./.imgs/readme-1641287704584-613d44afa250b17be45e5b366487d1dbd42939da44543700b5e7fbd7f6a8ca9e.png
find . -maxdepth 6 -name   0.26s user 3.21s system 94% cpu 3.683 total

---

➜  hjxh_express_match git:(main) time find .  -name readme-1641287704584-613d44afa250b17be45e5b366487d1dbd42939da44543700b5e7fbd7f6a8ca9e.png
./.imgs/readme-1641287704584-613d44afa250b17be45e5b366487d1dbd42939da44543700b5e7fbd7f6a8ca9e.png
find . -name   0.44s user 5.85s system 51% cpu 12.172 total

➜  hjxh_express_match git:(main) time find . -path './.imgs/*'  -name readme-1641287704584-613d44afa250b17be45e5b366487d1dbd42939da44543700b5e7fbd7f6a8ca9e.png
./.imgs/readme-1641287704584-613d44afa250b17be45e5b366487d1dbd42939da44543700b5e7fbd7f6a8ca9e.png
find . -path './.imgs/*' -name   0.46s user 5.93s system 51% cpu 12.299 total

➜  hjxh_express_match git:(main) time find . -path './.imgs/*'  ! -path "**/node_modules/*"  -name readme-1641287704584-613d44afa250b17be45e5b366487d1dbd42939da44543700b5e7fbd7f6a8ca9e.png
./.imgs/readme-1641287704584-613d44afa250b17be45e5b366487d1dbd42939da44543700b5e7fbd7f6a8ca9e.png
find . -path './.imgs/*' ! -path "**/node_modules/*" -name   0.46s user 5.91s system 51% cpu 12.268 total
command:grep
!!!tip 1. use grep -n rather than grep to get line number always! 2. the zsh/bash has done an alias for grep adding the --color-auto option
only display file name
grep -l
ref:
display lines before or after or surround specific lines
# A: after
grep -A 3 XXX

# B: before
grep -B 3 XXX

# C: context
grep -C 3 XXX
ref:
skip binary files
grep -I
see: - linux - How to suppress binary file matching results in grep - Stack Overflow
good articles of grep relative
ref
how to match raw string
use -F.
!!!warning But if the raw string begins with -, then we need to use -e to force grep recognizing the following string as a pattern otherwise it would catch errors.
sample:

```sh
grep -F "xxx" <<< "xxxyyy"
# ok

grep -F -e "-xxx" <<< "-xxxxyyy"
# ok

grep -F "-xxx" <<< "-xxxx"
# error
```
ref
how to combine grep with if
using -q.
if  grep -q hello a.txt ; then echo yes;else echo no; fi
# yes

if grep -q word a.txt; then echo yes; else echo no; fi
# no
ref
how to exclude pattern
# `-v`: `--invert-match`, not match/contain specific string
grep -v XXX

# `-w`: word
# `-wv`: not match specific word
grep -wv XXX

# `-E`: extended regular script
grep -Ewv "AAA|BBB"
ref
- very good: How to Exclude in Grep | Linuxize
how to exclude dir (--exclude-dir=dir)
Recent versions of GNU Grep (>= 2.5.2) provide:
--exclude-dir=dir
which excludes directories matching the pattern dir from recursive directory searches.
So you can do:
# exclude one dir
grep -R --exclude-dir=node_modules 'some pattern' /path/to/search

# exclude multi dirs
grep -R --exclude-dir={AAA,BBB,CCC}  xxxx
ref:
how to limit depth (-maxdepth)
find . -maxdepth 4 -type f -exec grep "11.0.0_r1" {} \;
ref:
tip: grep by lines context is MUCH FASTER than grep by words context, and even better for output
➜  erb git:(main) ✗ time (cat release/build/mac/皇家小虎快递分析系统.app/Contents/Resources/app/dist/main/main.js | tr ";" "\n" | grep --context=3 'fake-database')
# var n=this&&this.__importDefault||function(e){return e&&e.__esModule?e:{default:e}}
# Object.defineProperty(t,"__esModule",{value:!0}),t.isDbFinished=t.initDbUpdateResult=t.initDbInsertResult=t.DB_UPDATE_DECLINED=t.DB_UPDATED=t.DB_INSERT_DUPLICATED=t.DB_INSERT_SUCCESS=t.DB_UNKNOWN=t.DB_TIMEOUT=t.DB_TABLE_NOT_EXISTED=t.prisma=void 0
# const i=r(72298),a=`file:${n(r(71017)).default.join(i.app.getPath("userData"),"express_match.sqlite.db")}?connection_limit=1`
# process.env.DATABASE_URL=a,console.log({__dirname,rawDBPath:"file:dev.db?connection_limit=1",newDBPath:a}),t.prisma={erp:{create:()=>{console.log("fake-database: creating one")},findMany:()=>{console.log("fake-database: finding many")},upsert:()=>{console.log("fake-database: upserting one")}}},t.DB_TABLE_NOT_EXISTED="DB_TABLE_NOT_EXISTED",t.DB_TIMEOUT="DB_TIMEOUT",t.DB_UNKNOWN="DB_UNKNOWN",t.DB_INSERT_SUCCESS="DB_INSERT_SUCCESS",t.DB_INSERT_DUPLICATED="DB_INSERT_DUPLICATED",t.DB_UPDATED="DB_UPDATED",t.DB_UPDATE_DECLINED="DB_UPDATE_DECLINED"
# t.initDbInsertResult=()=>({nTotal:0,nInserted:0,nDuplicated:0,nTimeout:0,nUnknown:0,nTableNotExist:0})
# t.initDbUpdateResult=()=>({nTotal:0,nUpdated:0,nDropped:0,nTimeout:0,nUnknown:0,nTableNotExist:0})
# t.isDbFinished=e=>{let t=0
( cat  | tr ";" "\n" | grep --color=auto  --context=3 'fake-database'; )  0.20s user 0.01s system 121% cpu 0.169 total
➜  erb git:(main) ✗ time ( grep -iEo '.{255}fake-database.{255}' release/build/mac/皇家小虎快递分析系统.app/Contents/Resources/app/dist/main/main.js | tr ';' '\n' )
# =`file:${n(r(71017)).default.join(i.app.getPath("userData"),"express_match.sqlite.db")}?connection_limit=1`
# process.env.DATABASE_URL=a,console.log({__dirname,rawDBPath:"file:dev.db?connection_limit=1",newDBPath:a}),t.prisma={erp:{create:()=>{console.log("fake-database: creating one")},findMany:()=>{console.log("fake-database: finding many")},upsert:()=>{console.log("fake-database: upserting one")}}},t.DB_TABLE_NOT_EXISTED="DB_TABLE_NOT_EXISTED",t.DB_TIMEOUT="DB_TIMEOUT",t.DB_UNKNOWN="DB_UNKNOWN",t.DB_INSERT_SUCCESS="D
( grep --color=auto --exclude-dir={.bzr,CVS,.git,.hg,.svn,.idea,.tox} -iEo  t)  3.27s user 0.01s system 99% cpu 3.279 total
tip: grep by negative captured group needs to use ggrep
Examples Given the string foobarbarfoo:
bar(?=bar)     # finds the 1st bar ("bar" which has "bar" after it)
bar(?!bar)     # finds the 2nd bar ("bar" which does not have "bar" after it)
(?<=foo)bar    # finds the 1st bar ("bar" which has "foo" before it)
(?<!foo)bar    # finds the 2nd bar ("bar" which does not have "foo" before it)
You can also combine them:
# finds the 1st bar ("bar" with "foo" before it and "bar" after it)
(?<=foo)bar(?=bar)
ref:
grep -Pio '(?<=heads\/)(.*?)(?=\n)' text.txt # P option instead of E
ref: https://stackoverflow.com/a/45534127/9422455
grep filter in/out files via l | v | L


ref
command:tree
筛选文件
法一:标准做法是使用--prune -P PATTERN
!!! warning 注意这里的 PATTERN 不是标准的正则,具体可以见man tree内关于-P的说明: text -P pattern List only those files that match the wild-card pattern. You may have multiple -P options. Note: you must use the -a option to also consider those files beginning with a dot `.' for matching. Valid wildcard operators are `*' (any zero or more characters), `**` (any zero or more characters as well as null /'s, i.e. /**/ may match a single /), `?' (any single character), `[...]' (any single character listed between brackets (optional - (dash) for character range may be used: ex: [A-Z]), and `[^...]' (any single character not listed in brackets) and `|' separates alternate patterns. A '/' at the end of the pattern matches directories, but not files.
2022/07/04 11:55:46 (base) ➜  2.0b4.0.9 git:(master) ✗ tree --prune -P "*.db" | head -n 5
.
├── 1d35a41b3adb8b335cc59362ad55ee88
│   ├── Account
│   │   └── Beta.db
│   ├── ChatSync
法二:基于 grep
可以使用tree -f打印完整路径再使用 grep:
2022/07/04 11:59:24 (base) ➜  2.0b4.0.9 git:(master) ✗ tree -f | grep -E "\.db$" | head -n 5
│   │   ├── ./1d35a41b3adb8b335cc59362ad55ee88/Account/Beta.db
│   │   ├── ./1d35a41b3adb8b335cc59362ad55ee88/ChatSync/ChatSync.db
│   │   ├── ./1d35a41b3adb8b335cc59362ad55ee88/Contact/wccontact_new2.db
│   │   ├── ./1d35a41b3adb8b335cc59362ad55ee88/Favorites/favorites.db
│   │   ├── ./1d35a41b3adb8b335cc59362ad55ee88/FileStateSync/filestatesync.db
也可以使用find打印完整路径再使用 grep:
2022/07/04 11:59:31 (base) ➜  2.0b4.0.9 git:(master) ✗ find . | grep -E "\.db$" | head -n 5
./KeyValue/1d35a41b3adb8b335cc59362ad55ee88/KeyValue.db
./Backup/1d35a41b3adb8b335cc59362ad55ee88/A2158f8233bc48b5/Backup.db
./Backup/1d35a41b3adb8b335cc59362ad55ee88/F10A43B8-5032-4E21-A627-F26663F39304/Backup.db
./1d35a41b3adb8b335cc59362ad55ee88/solitaire/solitaire_chat.db
./1d35a41b3adb8b335cc59362ad55ee88/Stickers/stickers.db
也可以直接摆烂,不打印路径,从而呈现一定的文件夹结构:
2022/07/04 12:00:04 (base) ➜  2.0b4.0.9 git:(master) ✗ tree | grep -E "\.db$" | head -n 5
│   │   ├── Beta.db
│   │   ├── ChatSync.db
│   │   ├── wccontact_new2.db
│   │   ├── favorites.db
│   │   ├── filestatesync.db
总体来看,这三者都不如法一。
how to display chinese (-N)
tree -N
ref:
how to exclude dir(-I)
# use `|` to split choices

# exclude
tree -I "XXX|YYY"   # maybe it means 'ignore'
ref:
how to change default char style
see: - "tree" command output with "pure" (7-bit) ASCII output - Unix & Linux Stack Exchange
使用 --charset 选项:
<!-- default -->
2022/07/04 11:52:36 (base) ➜  2.0b4.0.9 git:(master) ✗ tree --prune -P "*.db"
.
├── 1d35a41b3adb8b335cc59362ad55ee88
│   ├── Account
│   │   └── Beta.db
│   ├── ChatSync
│   │   └── ChatSync.db

<!-- ascii -->
2022/07/04 11:53:14 (base) ➜  2.0b4.0.9 git:(master) ✗ tree --prune -P "*.db" --charset ascii
.
|-- 1d35a41b3adb8b335cc59362ad55ee88
|   |-- Account
|   |   `-- Beta.db
|   |-- ChatSync
|   |   `-- ChatSync.db
command:head/tail
head basic usage
head 这个命令行其实没有什么要讲的,用法非常简单。
# output the first 5 lines (default)
head FILE

# output the first N lines (replace "N")
head -n "N" FILES
BEST-PRACTICE: skip lines
# limit 5
| head -n 5

# skip 5
| tail -n -5

# skip 5 and limit 5
| tail -n -5 | head -n 5
sample
I used this to perform a page switch action.
ref
linux - Print a file, skipping the first X lines, in Bash - Stack Overflow
sorting - Is there a way to ignore header lines in a UNIX sort? - Stack Overflow
Bash: Skipping lines at the top or bottom of a stream – Fabian Lee : Software Engineer
how to exclude the last k rows
但是今天 2022-01-26 碰到了一个问题,就是要获取前 n-1 行,然后试了 stackoverflow 上的方案好像都不对。
head -n -1 FILE
后来才知道,是因为 mac 的原因,要用ghead才行……
brew install coreutils
ghead -n -4 main.m
而 ghead 是在 coreutils 里面,这个名字一看我就有,所以也不用装了。
ref:
discuss: use head or sed
今天之所以用到 head 其实是因为我想对一个流做 sed 处理,但略去最后一行。
我一开始想用 sed 里的范围标识(地址),但一直没试出来。
后来我把地址标识换成最简单的1,4s/find/replace/之后才意识到,我的思路是不对的。
1,4是一个确实被处理的范围选择,但结果就是,N 行中,前四行都被 sed 替换了,但是后面的行尽管没替换依旧会打印出来,而这正是 sed 的默认行为,它是一个流转换器。
那如果纯粹基于 sed,进行转换,并且去掉最后一行,就要用到-o结合好像是/p的 identifier,具体我也记不大清了。意思就是输出所有被匹配的行,但如果这样的话被匹配的行就会输出两遍了(两遍不必相同(NOT-SURE),一个是转换前,一个是转换后),所以另一个标识符就是阻止原内容的输出,这样就只输出匹配的行的处理结果。
所以,这个思路其实有问题,它可以对,也可以不对,它如果保证匹配 n-1 行,则对;否则就不满足需求了,我们的需求是处理前 n-1 行,并且不管匹配不匹配,都要输出,尽管实际上是都匹配的。
总之,理解到这层后,既可以用纯 sed 的方案,也可以用 head+sed 的方案,一个负责改,一个负责删即可,至于先后,结果都一样,也许 head 在前效率会更高一些。
所以,还是挺有意思的,这个。
command:top
Today(2022-01-27) I finally understood how to use the command of top (though htop is better for display but possibly more costly).
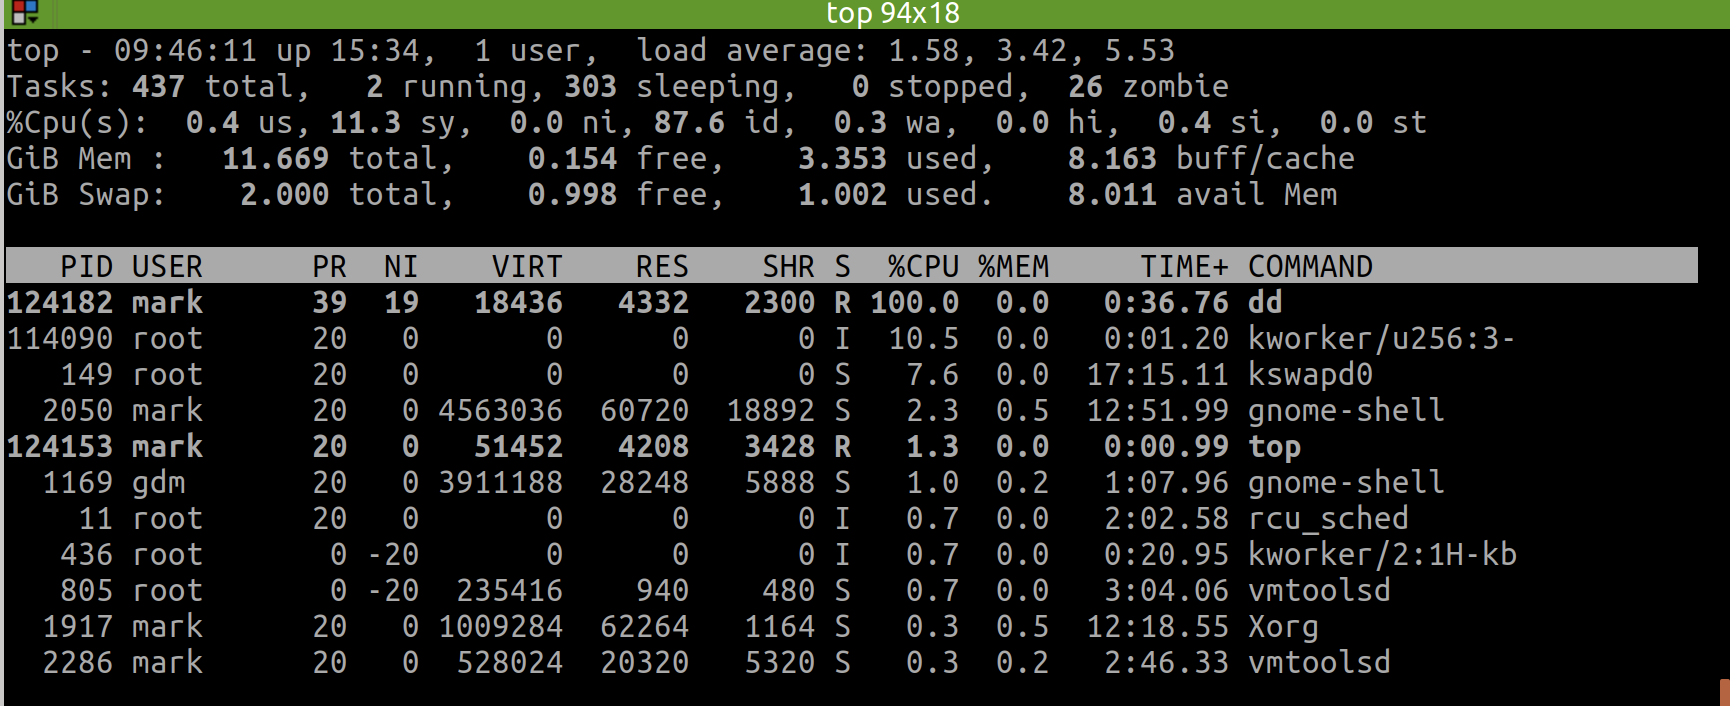
I can switch the display format of memory usage when top has gone to the interactive interface.
The first option I can use is E, which allows to switch memory unit between KiB | MiB | GiB | TiB.
And the second option I can use is m, which switches the memory display type between pure text, columns graph and block graph.
⚠️
- 不可以在命令行中直接用
top -M(显示以MB为单位的内存使用量),因为top -h的帮助中写的很清楚,只支持部分选项。在 stackoverflow 上有top -M的建议(see: linux - How to display meminfo in megabytes in top? - Unix & Linux Stack Exchange),但可能我的版本(Ubuntu 18)不支持。正确的做法,是先进入top交互界面,然后按E,这样就会切换单位,比如按两次切换到GB单位。另外,独立的,还可以按m去切换内存的显示样式,比如像htop那种竖条状!- 以上只在 ubuntu 上测试通过,在 mac 上我刚试了,不行!所以到底怎么用命令,还得根据平台自身!
- 具体的,可以通过
COMMAND -h去看简洁版的帮助页面,或者man COMMAND(e.g. Ubuntu Manpage: top - display Linux processes) 去看完整版的帮助页面!
command:cat|tac
reverse order of lines
| tac
ref
how to write raw string into file using cat
# example
GOPATH=$HOME/my-go
cat <<EOF >> ~/.profile
export GOPATH=$GOPATH
export PATH=$PATH:/usr/local/go/bin:$GOPATH/bin
EOF
ref:
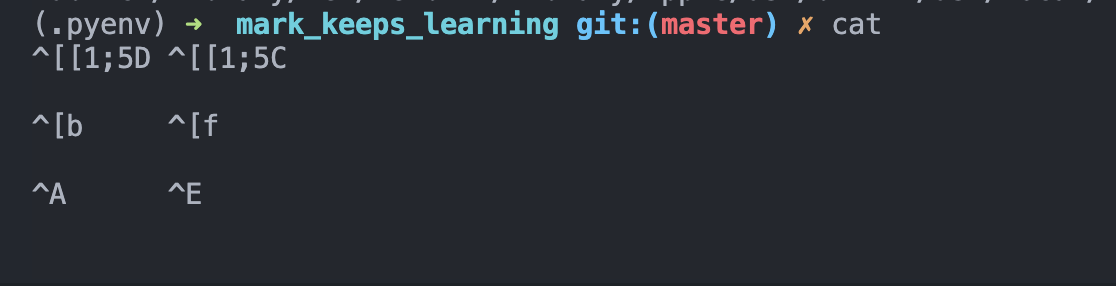
usage: how to know what's the bash string
When using bash or zsh, we are supposed to use the function of bindKey.
However, the key we typed are always hard to remember, e.g. what's the ctrl key?
Luckily, there's a super easy (and also interactive) way for us to know it via cat, just to type cat followed by enter in terminal, and then the terminal would display what the character would be when we typing them.
E.g. here is what's the result when we combine control | option | command with arrow left and arrow right would be:
command:zip|unzip|gunzip
(g)unzip a gzip file
failed to unzip a gzip file(empty):

successfully (g)unzipped a gzip file(empty):

ref
how to unzip to specific directory
unzip file.zip -d TARGET_DIR
ref:
command:kill
ps aux | grep -i electron | awk '{print $2}' | xargs sudo kill -9
ref:
https://stackoverflow.com/a/30486159/9422455
command:scp
sudo chown -R USER_NAME REMOTE_FOLDER
sudo chmod 777 REMOTE_FOLDER
the -R means "recursively" since there may be file deeply in the target folder that won't allow you to write.
Hence, you can know, you can specifically claim your authority on the file or directory, since it would not automatically transfer.
Thus, a flexible approach is that just add a -R flag.
reference: https://unix.stackexchange.com/a/347412
command:lsof
check status of port occupation
lsof -i:8888
command:ufw
# check status
sudo ufw status

# enable
sudo ufw enable

# white list
sudo ufw allow 9000

# reload
sudo ufw reload
ref:
command:time
I can directly using time ( COMMAND_1 | COMMAND_2 ), so that it can calculate the final time of this pipe.
However, time calculation is a little more sophisticated than what would I have thought, refer more to: bash - How can I time a pipe? - Unix & Linux Stack Exchange
command:tr
It's useful to split line to lines.
$ echo "111;222;333" | tr ';' '\n'
111
222
333
# use `nl` to add the line number
cat main.js | tr ';' '\n' | nl -ba | head -6
command:cd
usage: a superb scene using cd .
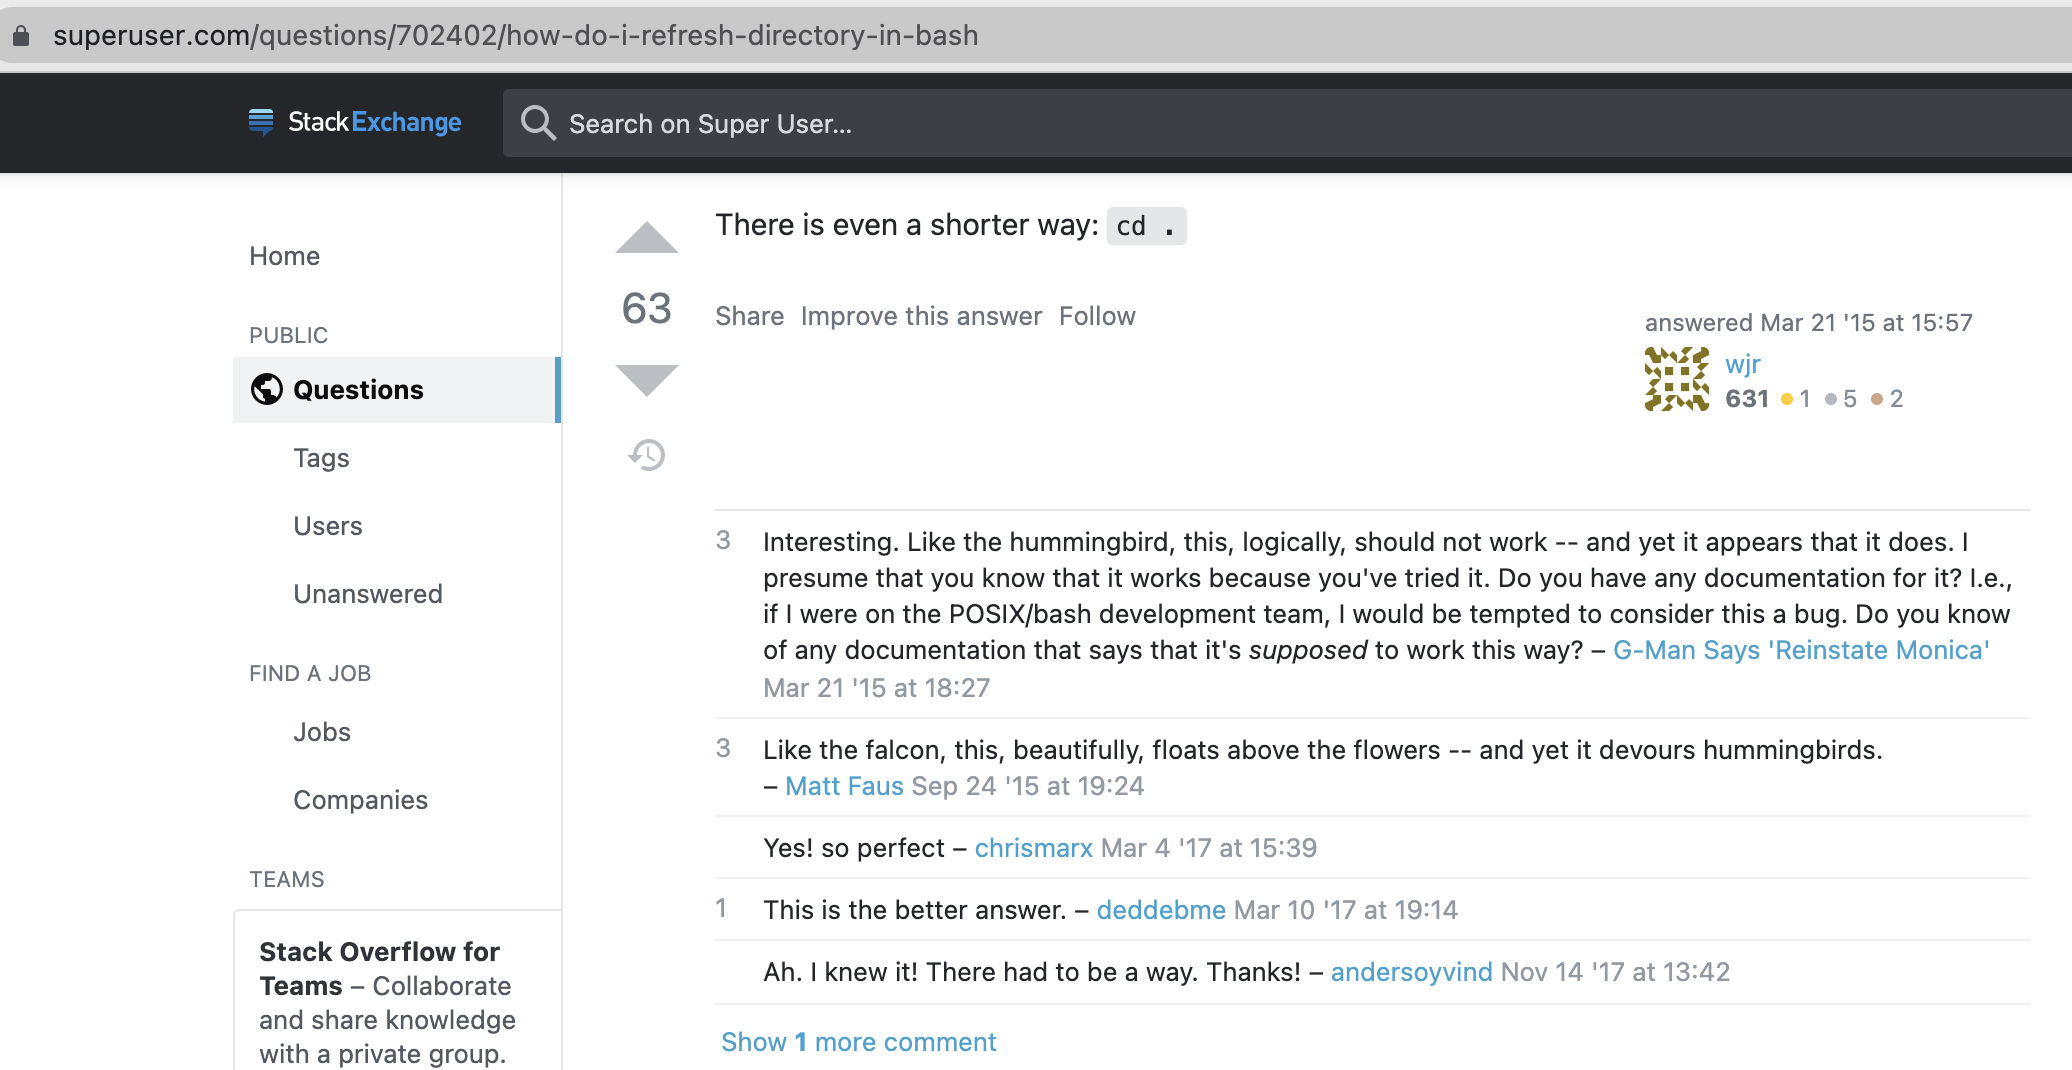
ref:
command:sed
ref
a good start:
how to replace a couple of files
SED_COMMAND `PIPED_FILES`
sample: replace all the files under a specific folder
sed -i "s/find/replace/g" `grep -rl find folder`
see:
how to ignore case in sed
/i
see: - sed Case Insensitive Search Matching and Replacement - nixCraft
how to print only matched lines
-nmeans "No automatically print the each line"/pmeans "Print the processed line"
# print only the matched lines
sed -n "s|find|replace|p"

# don't print any line (so useless)
sed -n "s|find|replace|"

# print all the line each, with matched line again(twice, and it's the same)
sed "s|find|replace|p"

# TODO: print the processed, and apply function on it.
ref:
✨ how to increment version number
resolution 1: use echo based on //e
special thanks to: https://stackoverflow.com/a/14348899/9422455
resolution 2: answer
gsed -i -E 's|(.*)"version": "([0-9]+)\.([0-9]+)\.([0-9]+)"|echo "\1\\"version\\": \\"\2.\3.$((\4+1))\\""|e' package.json
test what happened using
//pe
➜  erb_sqlite git:(main) head -3 release/app/package.json                                                                                                                                           [7-01-22 | 4:18:17]
{
  "name": "mark.hjxh.express_match",
  "version": "0.2.2",


➜  erb_sqlite git:(main) gsed -E 's|(.*)"version": "([0-9]+)\.([0-9]+)\.([0-9]+)"|echo "\1\\"version\\": \\"\2.\3.$((\4+1))\\""|pe' release/app/package.json                                        [7-01-22 | 4:08:57]
{
  "name": "mark.hjxh.express_match",
echo "  \"version\": \"0.2.$((2+1))\"",
  "version": "0.2.3",
explanation
In fact, the "version": "0.2.2", is changed into echo " \"version\": \"0.2.$((2+1))\"",.
And then the e syntax indicates run this sequency string as a command, so that it finally turns into "version": "0.2.3",
attention
- the
"needs to be escaped, and to escape", we need to use a\, and to let the\work in theechofunction, we need to escape it again, that is to be\\" sedwill match all line (including the leading space), and theewould execute all line. So if I just replace the version number part intoecho "\\"0.2.3\\"", then all the line would turns into"version": echo "\\"0.2.3\\"", which is certainly unwanted and deserves reflection.
core ref
bash - How to find/replace and increment a matched number with sed/awk? - Stack Overflow
perl | awk alternative
official hack way (but I failed)
#!/usr/bin/sed -f

/[^0-9]/ d

# replace all trailing 9s by _ (any other character except digits, could
# be used)
:d
s/9\(_*\)$/_\1/
td

# incr last digit only.  The first line adds a most-significant
# digit of 1 if we have to add a digit.

s/^\(_*\)$/1\1/; tn
s/8\(_*\)$/9\1/; tn
s/7\(_*\)$/8\1/; tn
s/6\(_*\)$/7\1/; tn
s/5\(_*\)$/6\1/; tn
s/4\(_*\)$/5\1/; tn
s/3\(_*\)$/4\1/; tn
s/2\(_*\)$/3\1/; tn
s/1\(_*\)$/2\1/; tn
s/0\(_*\)$/1\1/; tn

:n
y/_/0/
how to match digits ([0-9] or :digit:)
ref:
thanks for the direction to sed official documentation in this post.
how to insert text before first line of file
suppose the text is:
@tailwind base;
@tailwind components;
@tailwind utilities;
and the file is public/style.css
first, export this variable for better understanding of commands:
T='@tailwind base;
@tailwind components;
@tailwind utilities;'
F='public/style.css'
and copy file as a backup:
cp $F ${F}_
then the reset command is:
cp ${F}_ $F
resolution 1: use cat and ;
The cat approach meets our intuition, but needs a temp file.
First, we dump the T into temp file, then append F into temp, finally replace F with temp, that is:
echo $T > temp; cat $F >> temp; mv temp $F
Be careful about the second operator of >> since it means append otherwise the $T would be flushed, then $F keeps unchanged.
refer:
resolution 2: use cat and |
In last solution, we used 2 ';', and there is an easy way to change it to just 1 ';'.
echo $T | cat - $F > temp; mv temp $F
In this solution, the $T echoed into second pipe, and cat used - to capture it then joined with $F and dumped into temp, which surely is faster.
refer:
linux - What does the last "-" (hyphen) mean in options of
bash? - Super Usershell - Usage of dash (-) in place of a filename - Unix & Linux Stack Exchange
resolution 3: use sed s-command
In the above 2 solutions, we both need an IO, i.e. first saving into a 'temp' file and move to override the raw file, which could be low-efficiently and not elegant.
There's a way allowing us to finish the 'join' action just in the pipe and finally leads to inplace-modify target file. That is "sed's s-command".
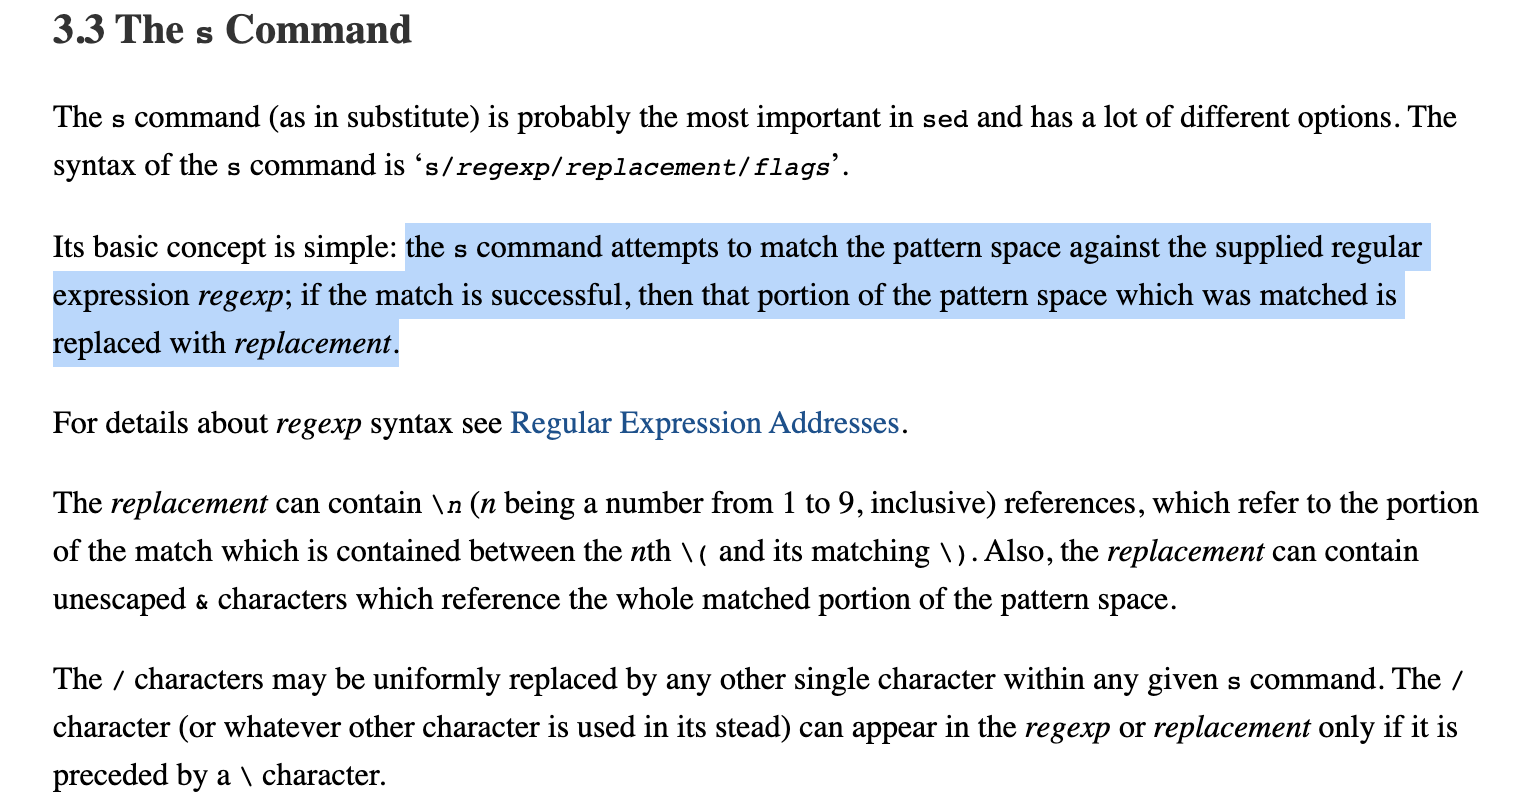

When using s-command, we can easily apply regex grammar to achieve what we want.

Like this, we can easily insert text in front of a sequency of text based on regex of '^', which means the beginning of text.
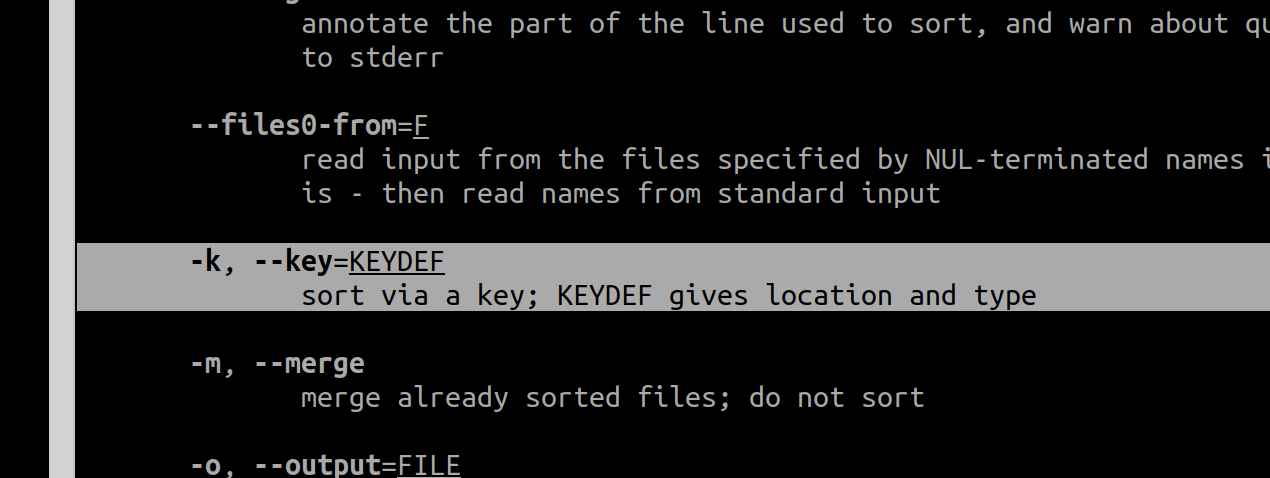
And then, since the basic grammar of how to insert text before specific line of an input file in sed is sed -i 'Ni TEXT' $F , the problem then converts to how to join '1i' with $T. That is what we just learned can be put into practice:
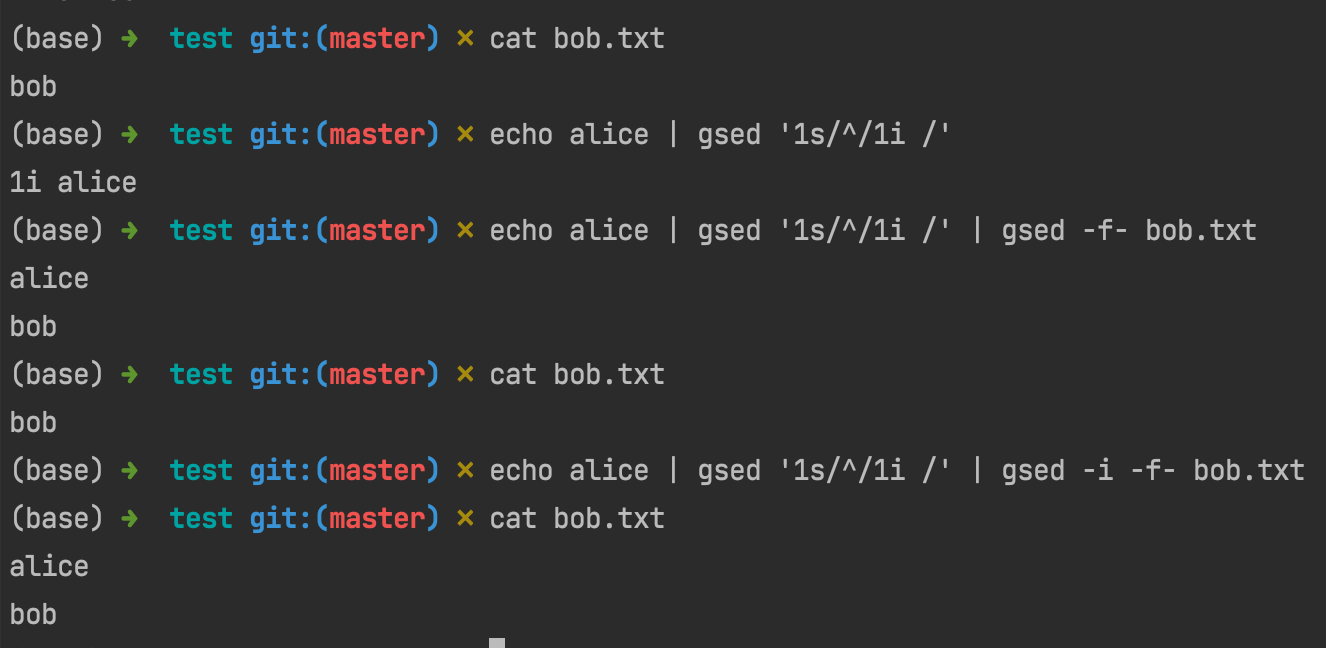
You see, now all the commands have nothing to do with the io, and the principle behind this command chain is straightforward: join into 1i $T then use it as sed -i’s parameter (via -f- which is the former pipe).
resolution 4: use sed e-command
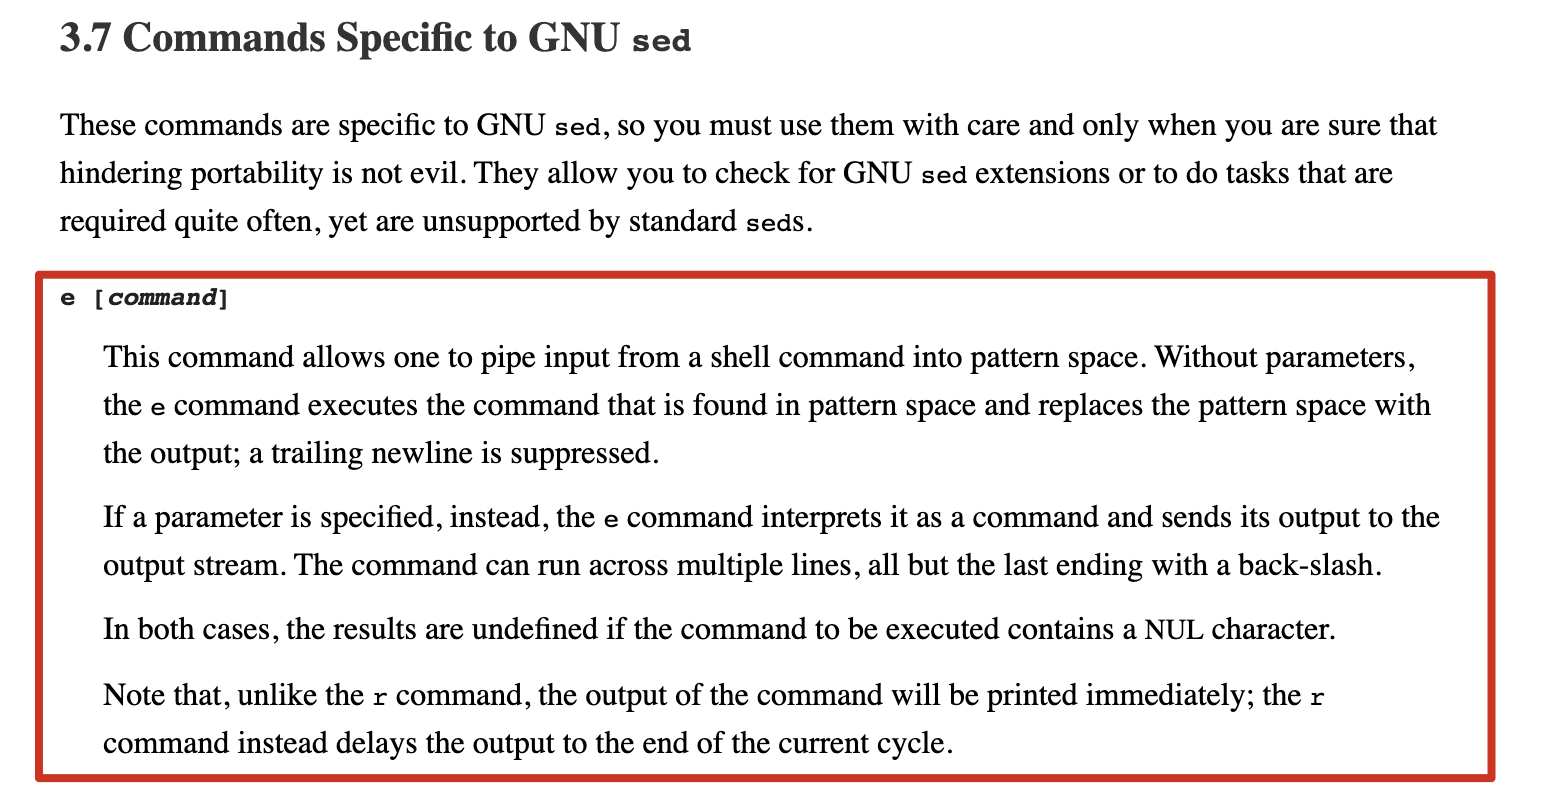
I'd think the e-command is quite confusing, but does good job.
I made some tests on the e-command to help myself understand.
In the above introduction, it indicates that if 'without parameters, the e command executes the command that is found in space and replace the pattern space with the output'.
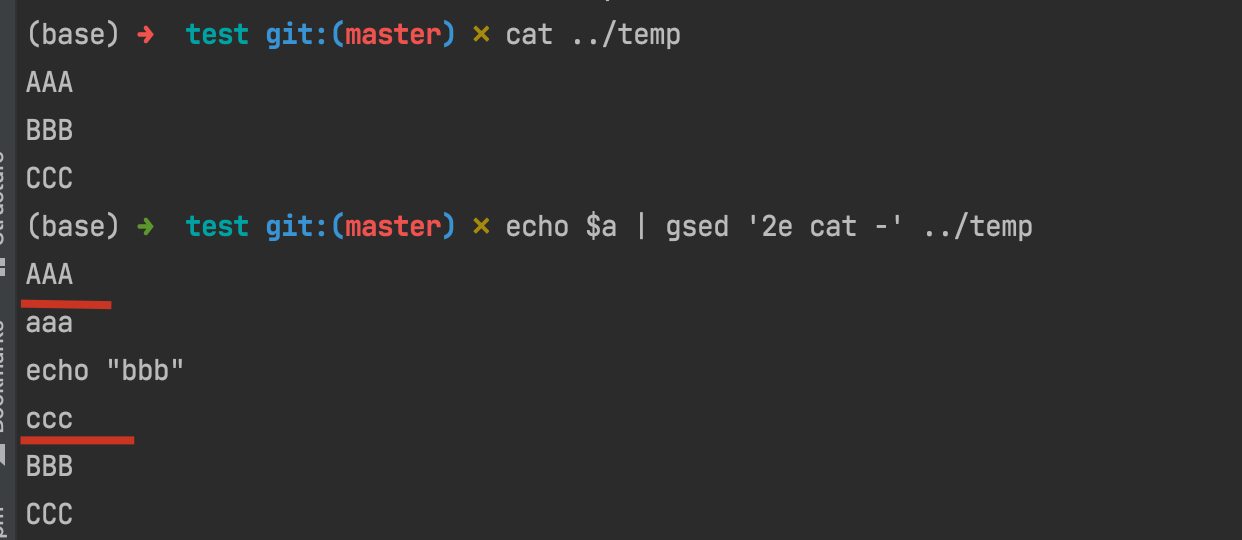
suppose we have a='aaa\necho "bbb" \nccc', then if we runs echo $a | gsed '2e', that's to say run the second line as a command and let others stay as what they are: 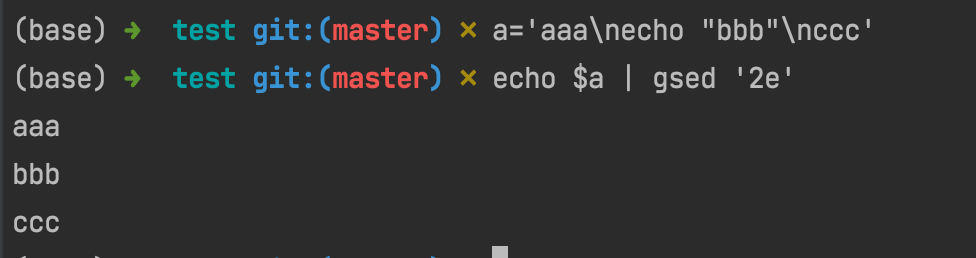
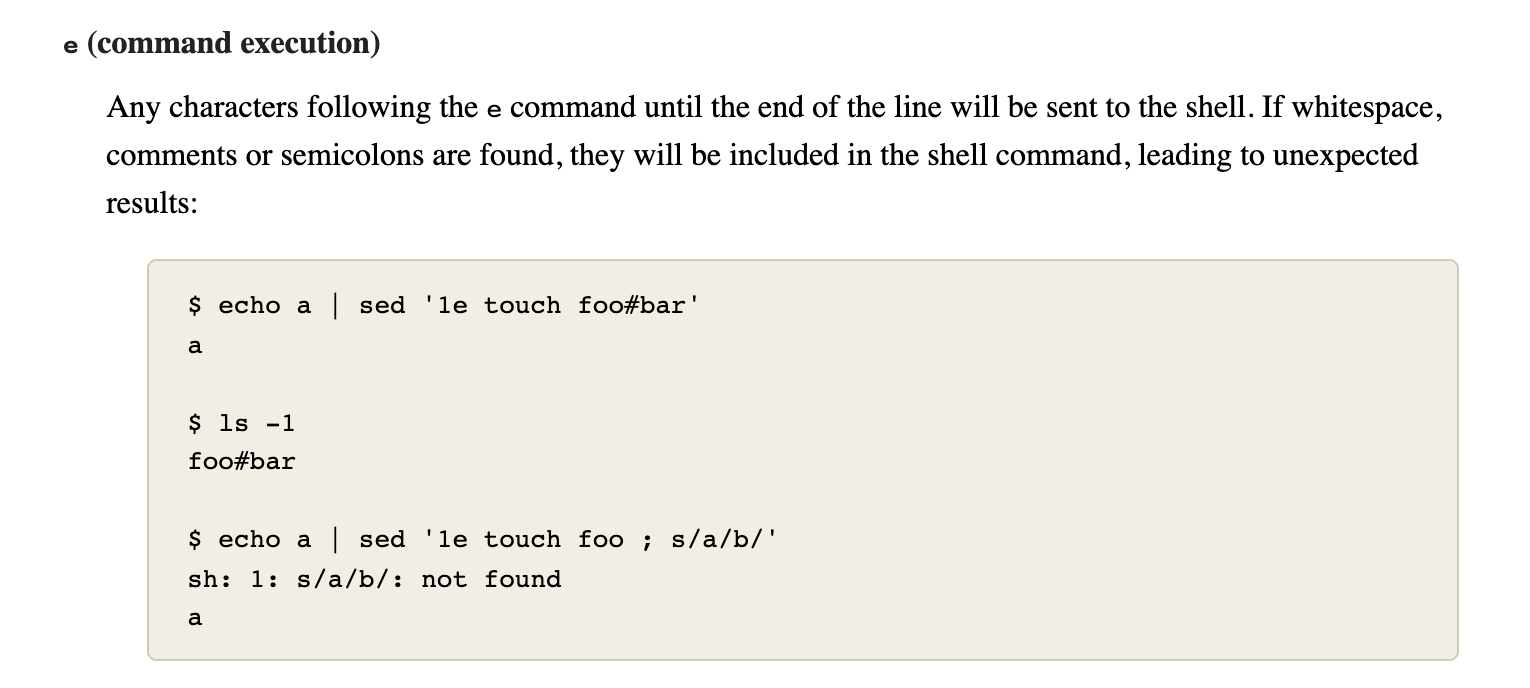
However, 'if a parameter is specified, instead, the e command interprets it as a command and sends its output to the output stream.'
I made an example which may help us to understand what's the mechanism of gsed 'ne xxx, in which xxx is the so-called 'parameter'.

You can see, as the following shows, since a is a three-line text and sent into the pipe as stream, so first line shows 'aaa', and second line shows 'echo "bbb"', as what we preset.
The most notable point is that since gsed sets a 3e command which means 'it will execute following commands at 3rd row of stream'. Thus, the following commands xxx\n echo "yyy"... are executed as separate commands split by lines.
Obviously, neither xxx nor zzz is a valid command and turned into an error. Plus, since the level of error usually is a bit higher than normal output, the error of zzz came before yyy and then is AAA.
Finally, when all the commands were executed, the next stream in pipe came, i.e. ccc, and all the sequences came into end.
ref:
Still, we had other topics to talk about.
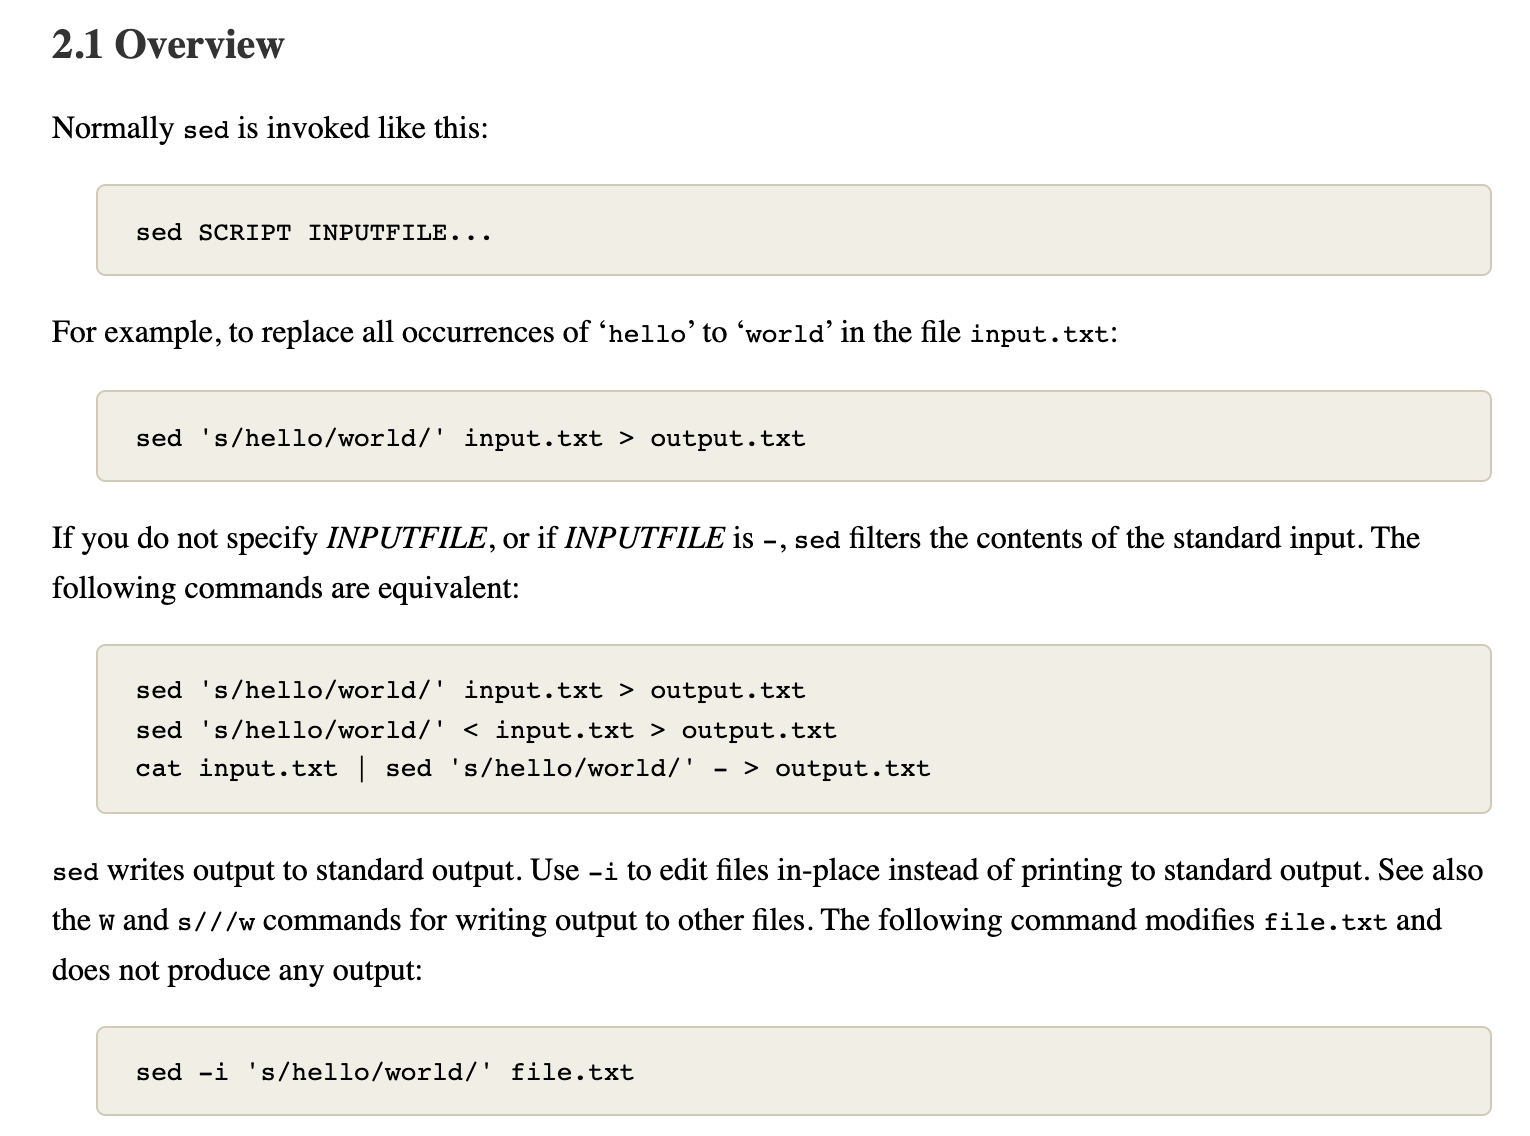
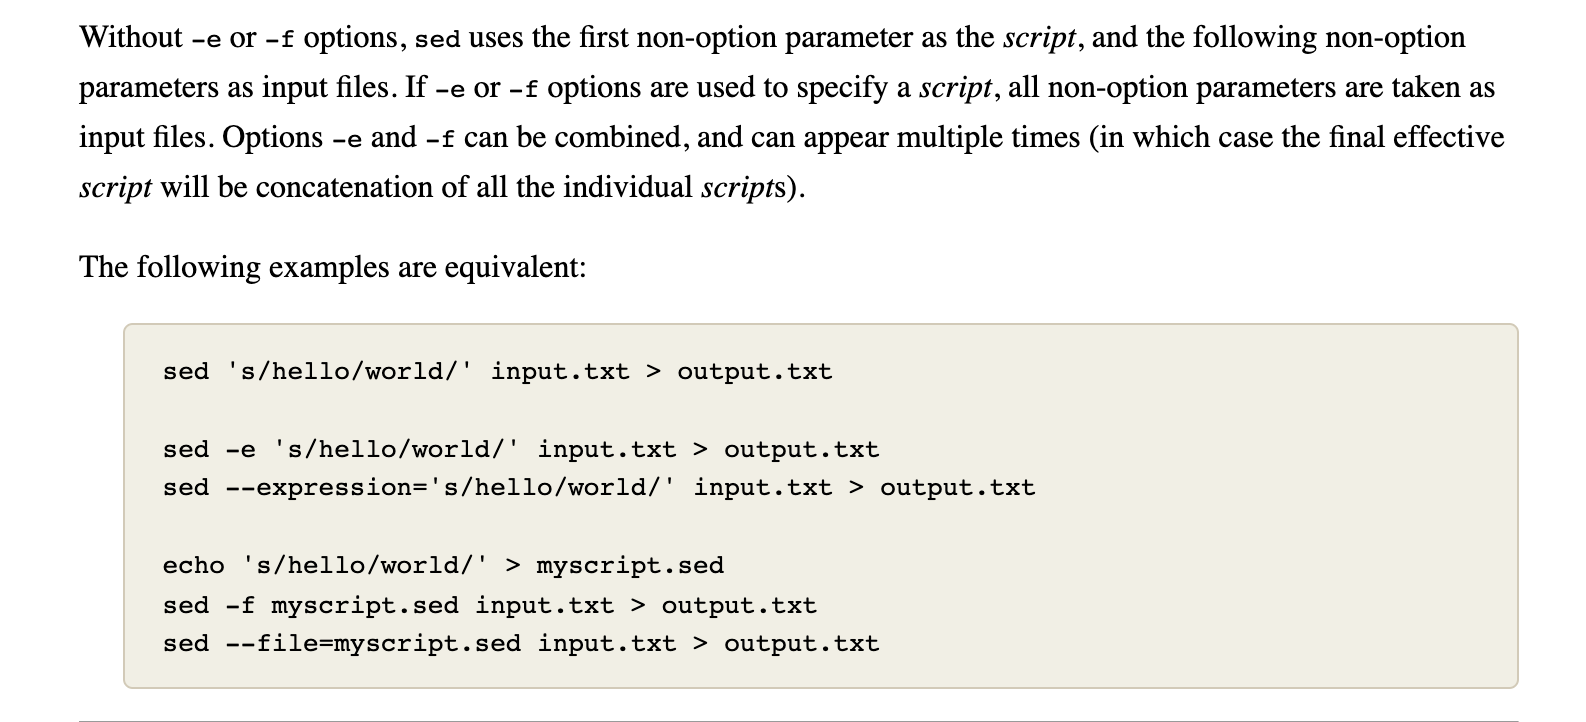
We can know the classic usage of sed is sed SCRIPT INPUTFILE, and if -e option is used to specify a script, with all non-option parameters taken as input files.
So what would happen when we combine the -e and an input file.
Back to what we covered the above, we can move a step further now.
In this example, we can see that gsed first read one line from ../temp file which is AAA, and then paused since the 2e flag to execute cat - command which shows all the input stream from echo $a, and finally continued to read the remaining rows of BBB and CCC.
So what about if we specify a -i option, which means change in position?
It's easy to understand, that is all the output would be sent into ../temp, so that ../temp changes to the output just like the result in this example shows.
Hence, we can derive from our conclusion: if we use the following command:
echo $T | gsed -i '1e cat -' $F
then the goal of inserting text before first line can be achieved just on the fly~
How amazing and beautiful it is!
ref:
conclusion
G1. To insert lines at the beginning of one file:
# 1. dump, dump, and move
echo $T > temp; cat $F >> temp; mv temp $F;

# 2. join, dump, and move
echo $T | cat - $F > temp; mv temp $F;

# 3. [sed s-command] concat-string, inplace-insert
echo $T | gsed '1s/^/1i /' | gsed -i -f- $F

# 4. [sed e-command] ... hard to conclude
echo $T | gsed -i '1e cat -' $F
G2. To insert lines at specific line:
# 1. if text is single line, refer: https://stackoverflow.com/a/6537587/9422455
gsed -i 'Ni $T' $F

# 2. if text is multi lines, refer:
echo $T | gsed -i 'Ne cat -' $F
FIXME: (failed) G3. To insert content after matched position:
# 1. [sed r-command]
echo $T | gsed -i '$P/r -' $F #  the '-' is same for '/dev/stdin'
G4. To insert multi lines manually:
# 1, when lines are already multiplied, just add `\` after each line, refer: https://askubuntu.com/a/702693

# 2, when lines are in one, using `\n`, refer: https://askubuntu.com/a/702690
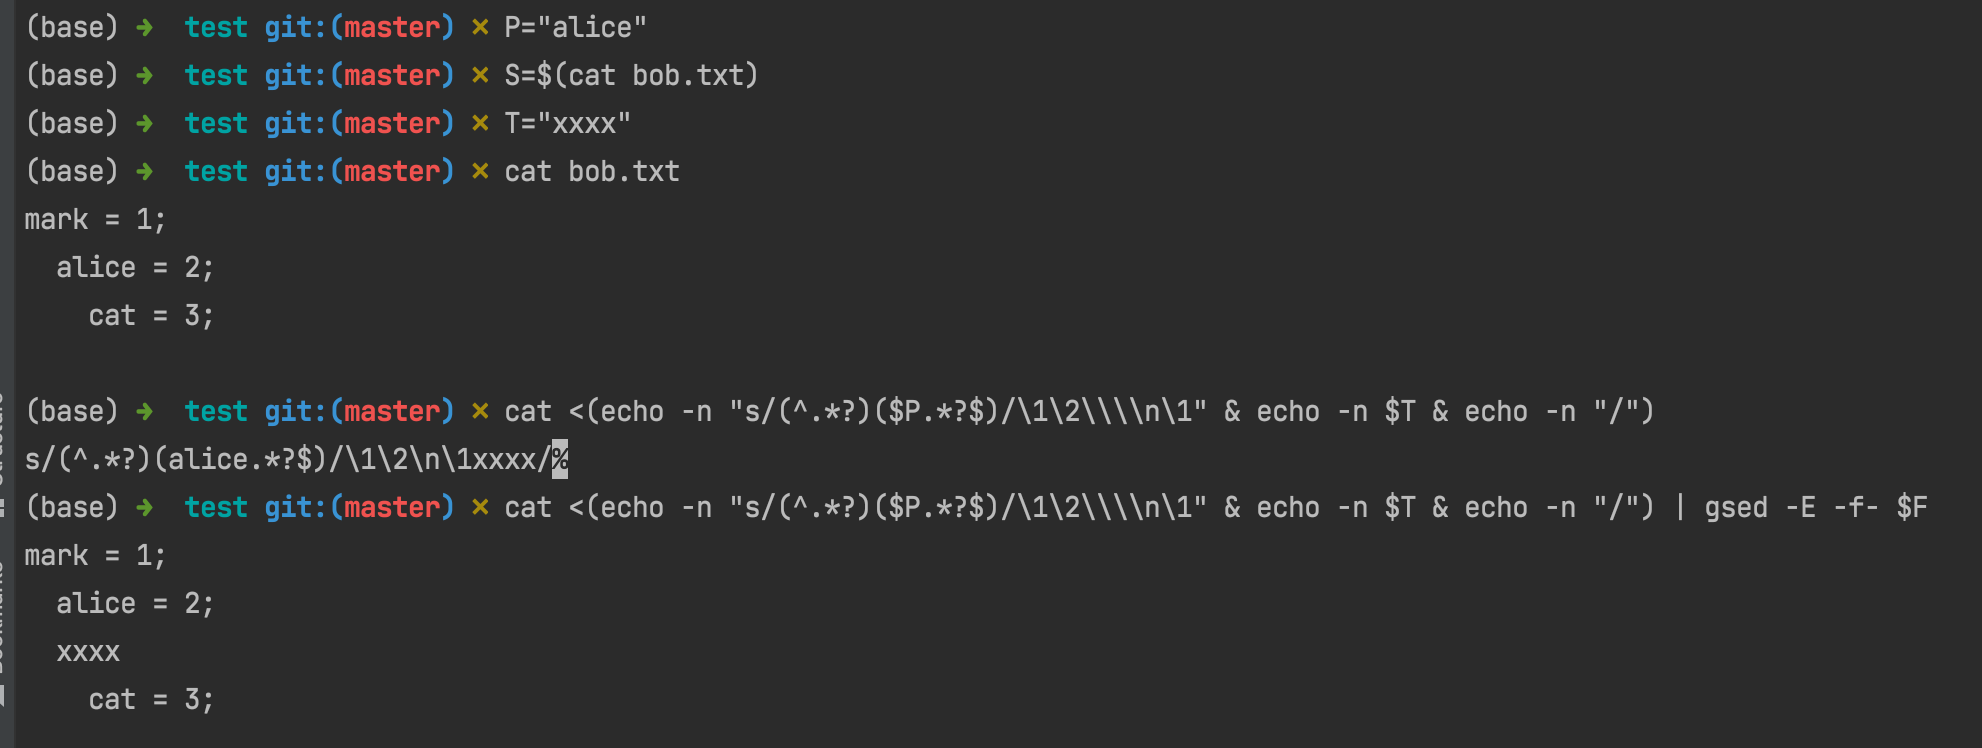
G5. To insert lines after matched line with the same leading space format:
⚠️ 嵌套 sed 正则注意事项
- 输入的文本不能与分隔符相同,否则需要转义。比如本次为了在代码中加入注释
//,就不方便用/当分隔符- 嵌套正则的时候,为了能分清一级与二级,可以应用不同的分隔符,比如本次更新用了
|作为一级,_作为二级
# 1. [sed s-command] leading space align with $P
# failed at 2022-01-25
# echo $T | gsed 's/^.*$/s\/(^.*?)($P.*$)\/\\1\\2\\n\0\//' | gsed -E -f- $F

# updated at 2022-01-25
echo $T | gsed 's|^.*$|s_^(.*?)('$P'.*)$_\\1\\2\\n\\1\0_|' | gsed -E -f- $F | grep --context=3 $T

# FIXME: (failed) 2. [sed s-command with named-pipe] [more straightforward]
cat <(echo -n "s/(^.*?)($P.*?$)/\1\2\\\\n\1" & echo -n $T & echo -n "/") | gsed -E -f- $F
ref:
how to replace multi-lines
use perl!
see: how to use perl to replace multi-lines
how to trim line
mark: There is no
trimcommand in linux, and it can be pretty easy/clear to be finished viased.
| gsed -r 's/\s*(.*?)\s*$/\1/'
ref
command:perl
only print matched lines
# 1. `-n`: not print all
# 2. `print if `: print conditional lines
perl -ne 'print if s/.*?((\d{1,3}\.){3}\d{1,3}).*/\1/'
ref
how to use perl to replace multi-lines
perl -0pe 's/search/replace/gms' file
-0: without the-0argument, Perl processes data line-by-line, which causes multiline searches to fail.-p: loop over all the lines of a file-e: execute the following arg as a perl script/s: changes the behavior of the dot metacharacter.so that it matches any character at all. Normally it matches anything except a newline "\n", and so treats the string as a single line even if it contains newlines./m: modifies the caret^and dollar$metacharacters so that they match at newlines within the string, treating it as a multi-line string. Normally they will match only at the beginning and end of the string./g: global replace(not sure)
ref:
explaining
-0: Multiline search replace with Perl - Stack Overflowexplaining
/m | /s: regex - Understanding Perl regular expression modifers /m and /s - Stack Overflow
special thanks to: Not sure if you know, but sed has a great feature where you do not need to use a / as the separator.
command:xargs
xargs for cp to copy from stdin
( $SH_GEN_FILES; $SH_GEN_DIR ) | xargs cp
ref
command:history
how to not display the number of history output
# resolution 1. combine with `cut`
history | cut -c 8-

# FAILED: resolution 2. using `-w`
# it failed on my MacOS, the problem maybe corresponds with GNU version
history -w /dev/stdout
ref
command:cut
cut column of list from XX to YY
echo "a/b/c/d/e/f/g/" | cut -d "/" -f 3
# c

echo "a/b/c/d/e/f/g/" | cut -d "/" -f -3
# a/b/c

echo "a/b/c/d/e/f/g/" | cut -d "/" -f 3-
# c/d/e/f/g/
ref
command:sort/uniq
sort by column/key
sort -k X
ref:
drop duplicated
PIPE-LINES | sort | uniq
ref
command:nl
# add line number for each line of output
| nl

# format with dot
| nl -w2 -s". "
sample

ref
FIXME: why there is extra spaces

gnu:command:rename
- install it first via
brew install rename - it's the easiest way to use
rename, although thesedand other approaches may also be helpful... - A more straightforward way is to use
forscript :::
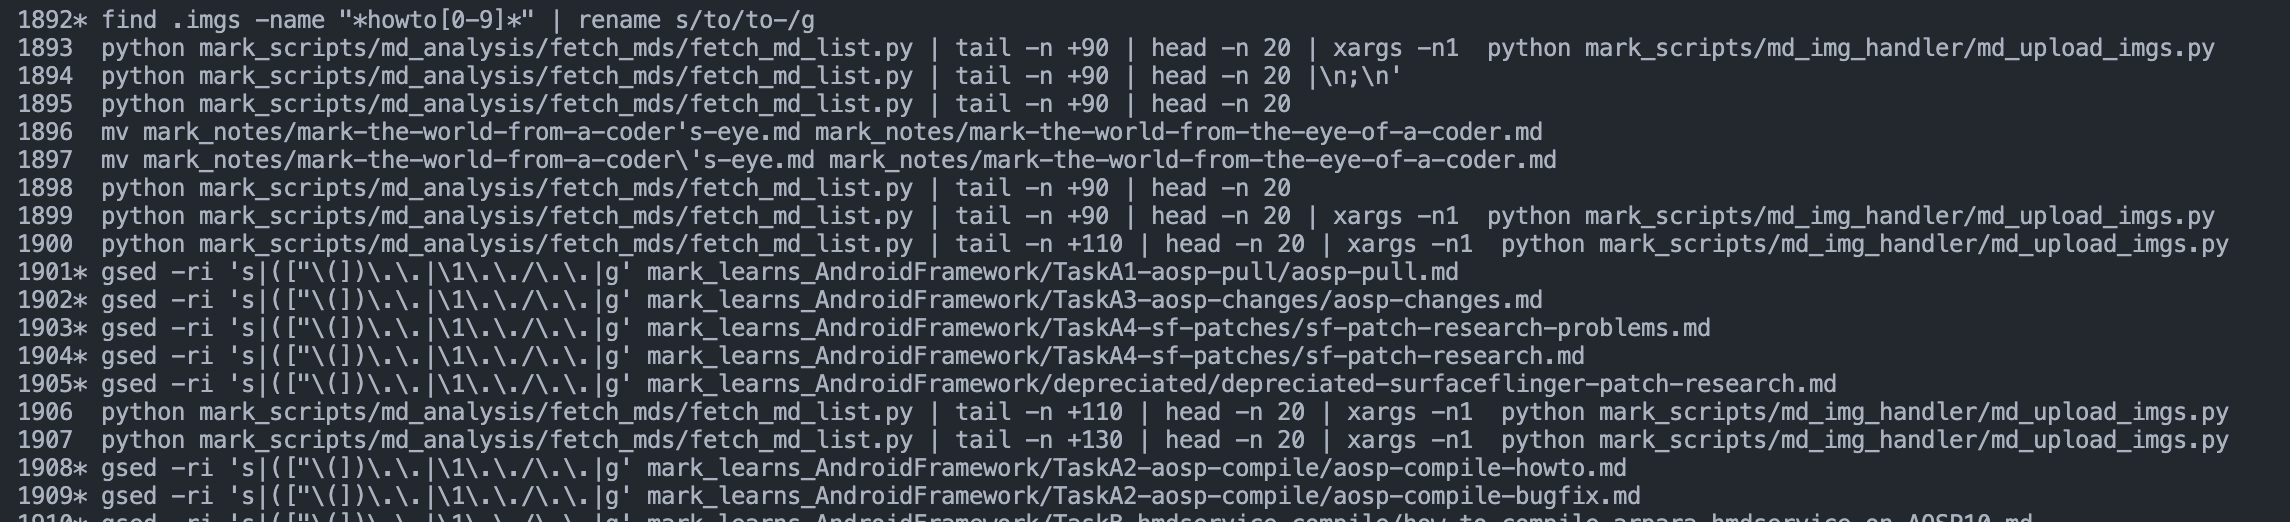
# rename files of pattern "F0000*" to be "F000*"
rename s/0000/000/ F0000*

# rename files, change the `$` to be empty, 注意name和rename都要转义,并且rename里要转义两次(应该是两层正则,就像我以前写的sed的两层正则一样)
find .imgs -name "*\$*" | rename s/\\$//g
sample

ref
mac:command:iostat
usage

sample

ref
command:less|more|most|vim
most适合大文本(比如 log),因为它默认不换行less有其他几个没有的一个功能: mark,只要按m加某个字母就可以打书签,然后按引号"再按字母就可以回去,非常快more很适合翻页浏览,可以敲空格直接翻页- 前三者都可以按
v进入nano的编辑博士,我发现竟然有语法高亮 vim因为我装了各种插件,自然是最屌的了,尤其是语法高亮
ref
command:echo|printf
# echo with newline
echo "------\nhello"

# echo without newline
echo -n world

# printf without new line
printf "I have no new line\nhhh"

# printf to re-print current line
printf "\rThis is one"
printf "\rThis is two"

ref
command:updatedb|locate
# install
sudo apt update && sudo apt install locate

# usage
sudo updatedb
locate eigen3
ref: